A lot of my time with working on my Arcade1Up so far was in trying to get the replacement controls right. But now that I had overcome a lot of mistakes on my part it was time to bring it all together.
The key parts needed to finish this work are:
- an LCD controller board
- a small amplifier
- a pair of car speakers
The LCD controller board is the the most important part of those at this stage as this is what’s going to allow the RetroPie to hook up to the monitor built into the Arcade1Up cabinet and make this whole project come together. One eBay purchase and five days of waiting and the board was in my hands ready to go.

My mess in progress! 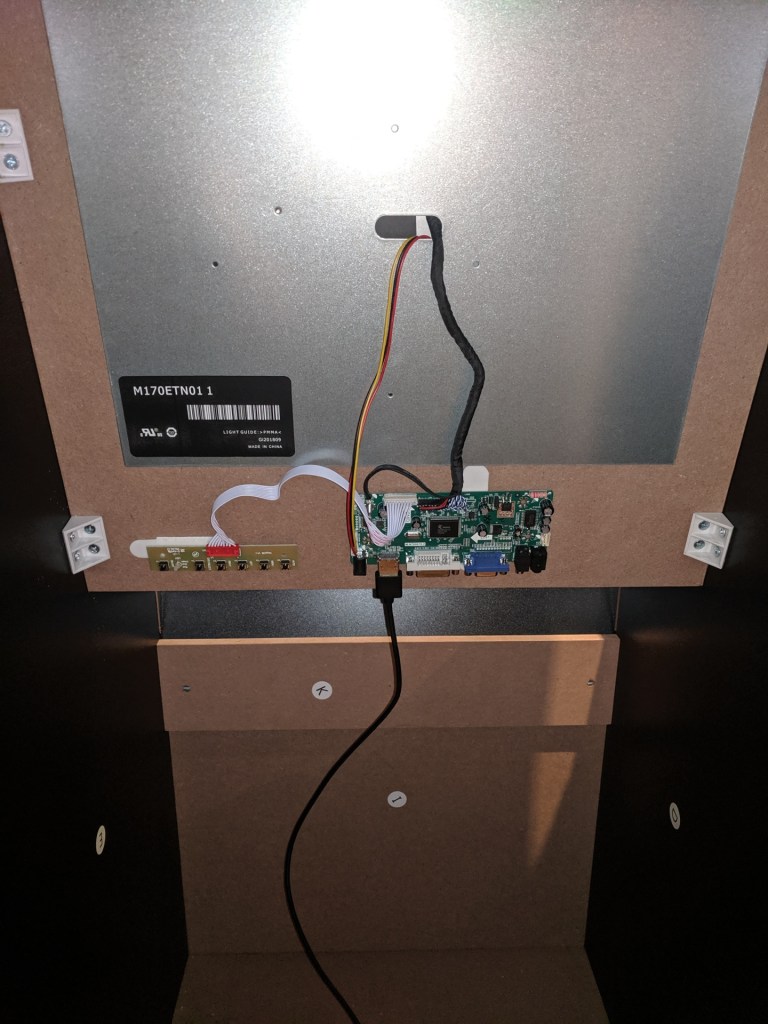
Much tidier!
The Arcade1Up uses a small board connected to the back of the monitor and it pretty much drives everything. Thankfully it is also easy to remove and unplug and the connectors are all compatible with the controller board. Please note that you need to use the right controller board for this to work and thankfully a sticker identifies the LCD model which made my eBay search a lot easier. The controller included all the cables as well as two daughter boards: an inverter and a control/menu panel. The inverter and cables weren’t needed as I could use what was there but I needed the other for adjusting brightness, contrast, etc. Once it was all connected the screen had HDMI, DVI and VGA ports plus audio output too.
I had already set up both the RetroPie and the controls so it was quick and easy to connect it all up. You pretty much connect the controls to the RetroPie via USB, hook that to the LCD via HDMI and then use audio out from the LCD to an amp and speakers. Throw in the power connections and you’re done! The LCD controller display and menus had defaulted to Chinese so a little effort was needed to find the language menu and switch it but once done I made a few adjustments to improve the picture and began tidying up.
To fix everything to the cabinet I used Velcro adhesive strips which let me detach the parts when needed but also safely remove them from the cabinet if I ever want to restore it. As I was still waiting for the speakers and amplifier I used a set of amplified PC speakers for the interim. Seeing the monitor switch on for the first time with a RetroPie logo was a great feeling and that my plan for modifying the cabinet was totally within my limited skillset.
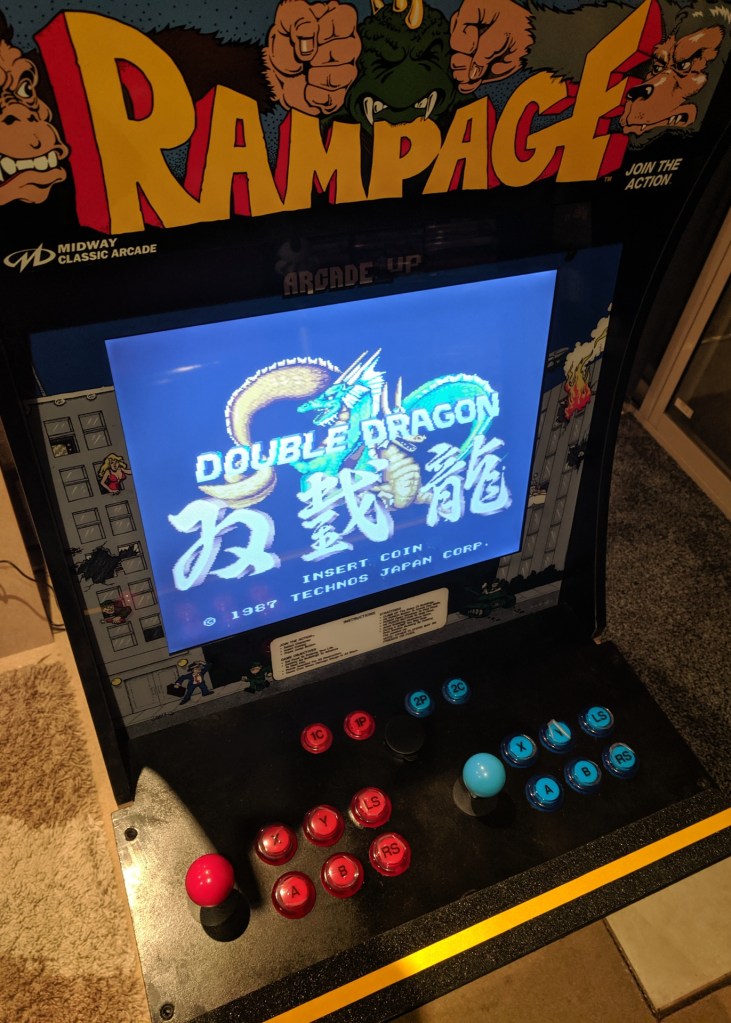
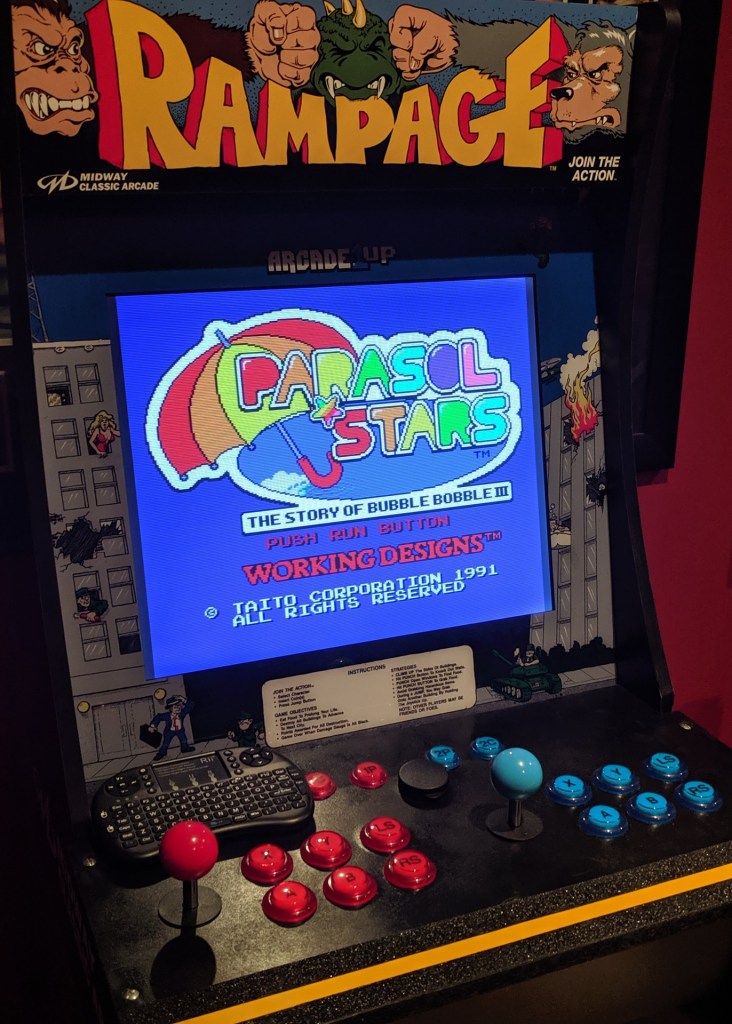
Some of the first games to play were emulated versions of Joust, Defender, Rampage and Gauntlet and thankfully the experience is still there with the bonus of Defender now being playable. Some further time will be needed to tweak the controls as the button configurations are not always ideal (instead of A/B for many it’s B/Y) but a lot can be done through configuration files. If I can get Robotron to work with the two sticks that would be something… 😉
Though I do like the interim speakers I have connected to the system (Altec Lansing AC45.1) they’re not very portable and the subwoofer might shake the cabinet apart. But they do pump out game audio amazingly well… especially anything that leverages stereo. There were a great many arcade titles that had excellent sound that I hadn’t appreciated due to locations drowning it out so making sure I get it right here will go a long way.
I’m still asking myself if I will wire up the lights for the buttons. I had ordered connectors that will let me do that but there’s already a lot of wiring to manage and that’s before I hook in the permanent speakers. I also found I needed to cut away parts of a couple of buttons to make room for the joystick cables that were getting knocked loose in testing. Will see how it goes! 🙂
I’m pretty excited now to see that I’m closing in on the end of this project. I thought initially I would have this done sooner but I had to learn a few lessons first before accepting that my deadline is now “when it’s done”. But I can now play a lot of games in a way I always wanted to and that’s a good place to be so it’s all been worth it. 🙂
Categories: Gaming, Modifying an Arcade1Up, Opinion, Technology, Tips & Tricks


This looks super cool and I am jealous! If I had anywhere to put one of these, I’d be interested in trying it for myself 🙂
LikeLiked by 1 person