In my first post on modifying my Rampage Arcade1Up machine I covered my plans and built the riser which is still going strong… and still upright! Now I’m on to the next part which is building out a new set of controls to replace the existing three player configuration.
Having it changed down to two players presents a lot of opportunities. It means I can add a lot of extra buttons for each player and that lets it work nicely with the RetroPie which prefers controllers with two buttons to act as “start” and “select”. I decided to set it up with a six button arrangement for each player so the arcade emulation can work with most fighting games. It also has the added benefit of working nicely with SNES games too which is a bonus.
For the new control panel I measured and cut out a new one using MDF again and based on the existing measurements but with a little more spacing for safety. When the new panel goes in I didn’t want it to jam in too hard to the rest of the cabinet so there’s a little gap around the edges but that will be fixed with a rubber seal that’ll keep it clean and reduce the chances of damage. Trying to outdo the original graphic design on the panel was going to be a challenge because I wanted to mimic the existing one but work with my changes. I did experiment with painting it but quickly decided on finding an alternative in the form of a vinyl sticker which I have organised to be custom printed and cut based on a Photoshopped spin on the original design. Still waiting on that to arrive and it will be the last thing to be done before the final assembly.

My control panel with the failed paint test. Still… it’s useful for visualising the final product. 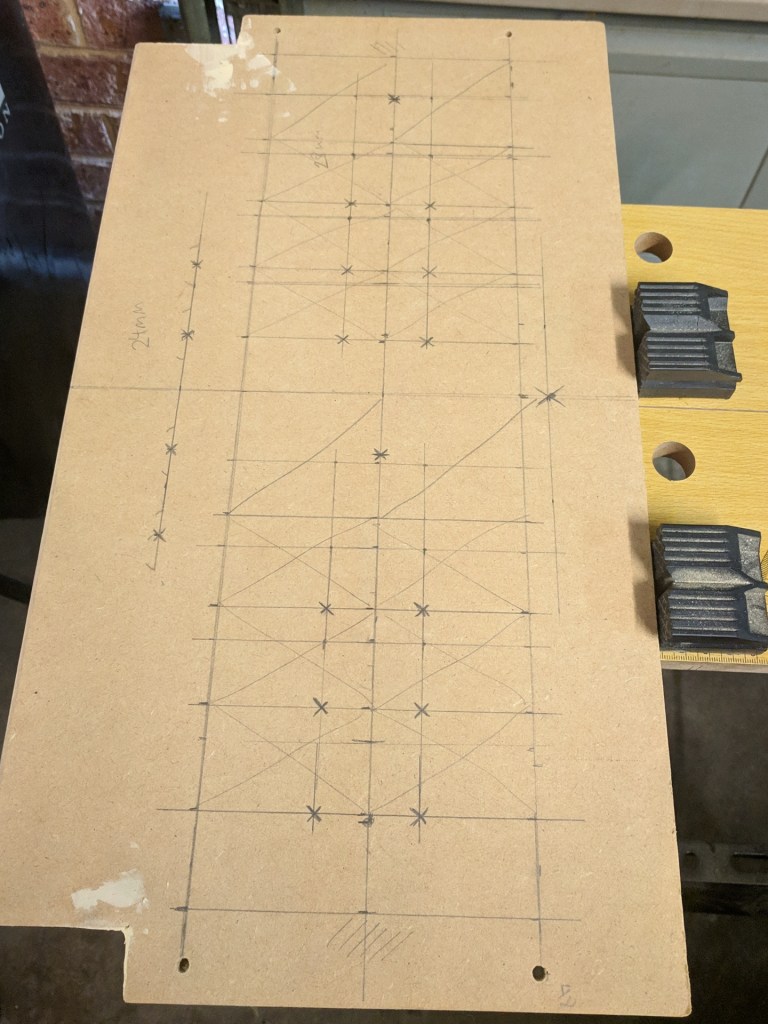
The underside of the panel with the button and joystick markings.
The new panel needs A LOT of holes cut. For each player it’s eight buttons (six action, start/1up and select/coin) and a joystick. One top of that I need space in the conrners to install speakers so holes will be cut there too. Finally, there’s an additional hole for a USB extension plug – though I’m changing the machine from three to two players I still want to keep my options open so a two port USB plug means controllers can be used to support up to four players. It also lets me plug in a keyboard too for configuring the system later.
Once most of the holes were drilled (not as well aligned as I had hoped) I moved into the buttons and made my first attempt at installing them and wiring up the panel. The USB controller board is a little fiddly but that’s not the main issue – the real problem for me was trying to figure which terminals on the buttons to use as there are four (2 for controls, 2 for LED) and they’re not as clearly marked as I had hoped. So of course I chose the wrong terminals on my first attempt! Alas I also found at this point that the wires for daisy chaining the LEDs together were missing from my kit so I need to rig that up a little later.
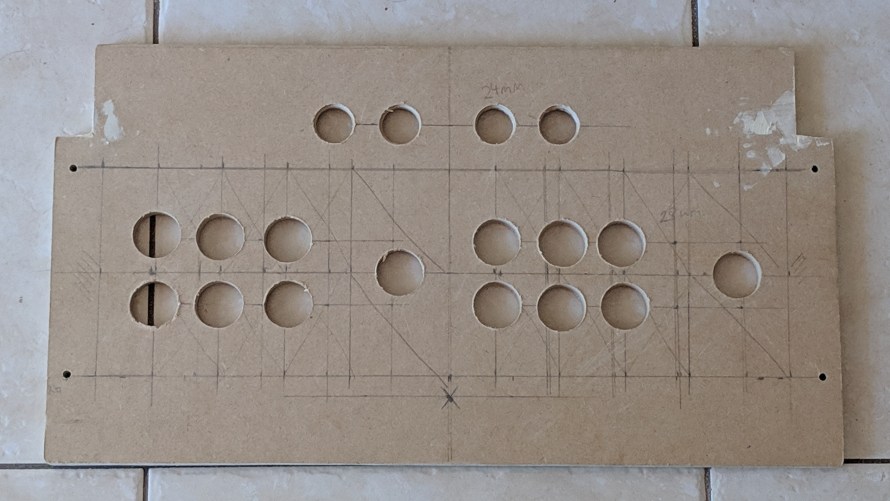
Holes are cut… mostly straight! 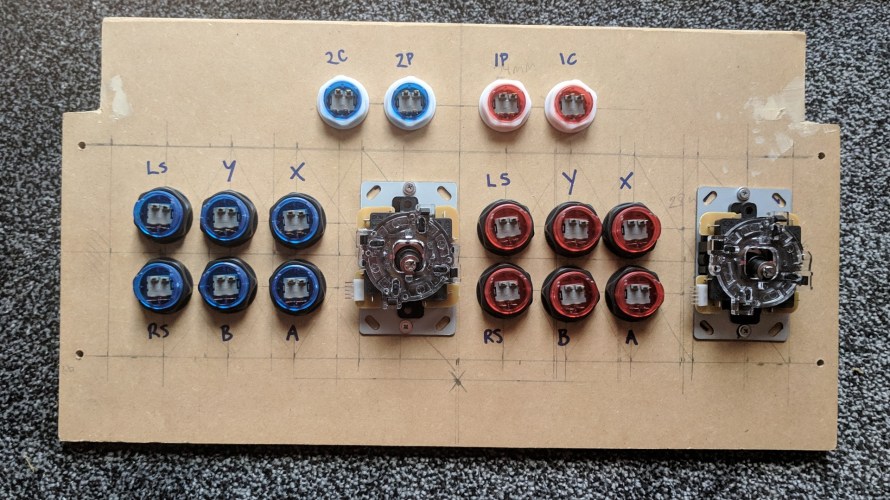
Buttons and joysticks added. 
The USB controllers and wires. 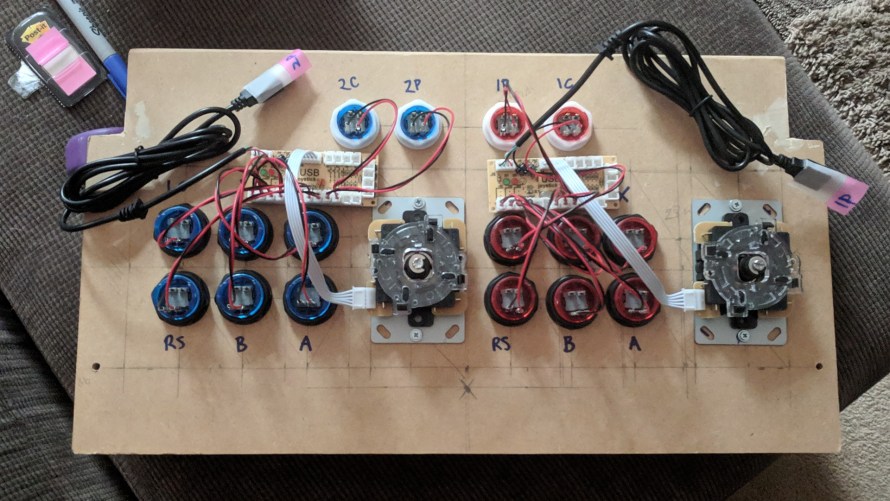
All wired up! 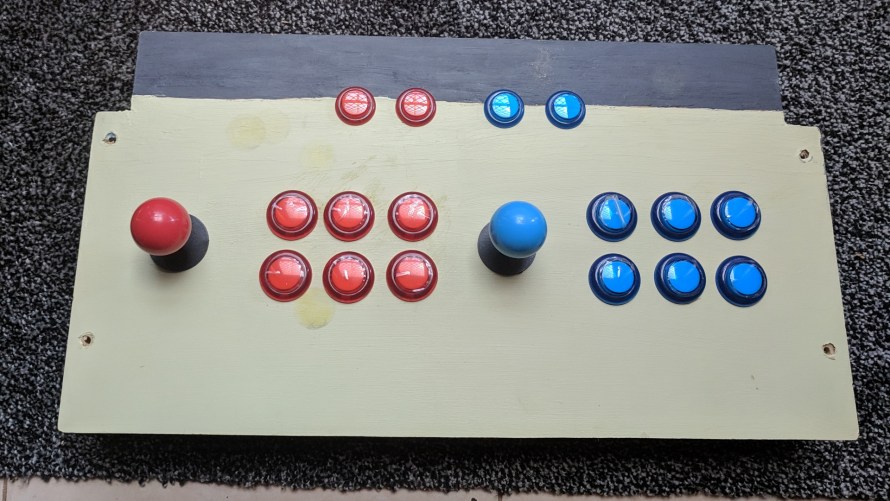
More to do but looks like it might work.
Once I got my head around the wiring for the button and LEDs I pulled it apart safely so that I could do a small job and that was labeling all the buttons. For the sake of consistency with the USB controllers I have with the RetroPie I decided to adopt the same naming conventions which I also marked on the underneath of the control panel. So the buttons for player one are labelled A, B, X, Y, LS (left shoulder), RS (right shoulder), 1P (start) and 1C (select).
The process to do this involved popping the button out of its housing and placing a black metallic sticker (found these sticker sheets on eBay) over the white plastic component so that we get an effective silhouette when the LED lights up. As long as I lined up the sticker well enough it looks like it was always part of the button. For the time being I’ve had to pack the components away until I get the remaining parts. When I wire it up for the last time and it’s hooked up to the RetroPie I’ll need to run the config utility in Emulation Station so that it recognizes the new controls.
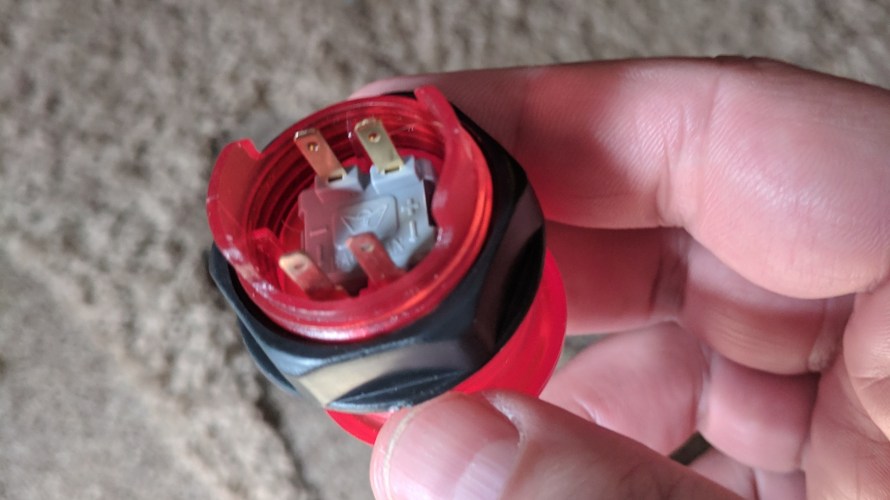
Two terminals too many. 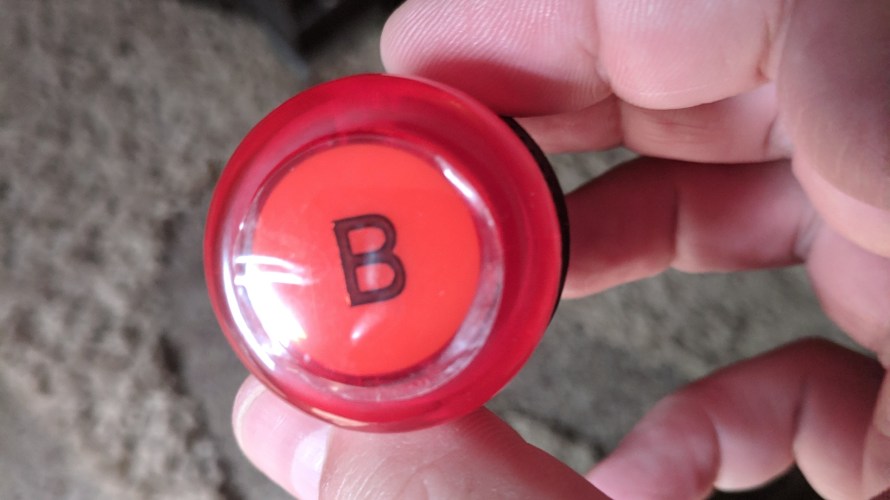
Newly labeled button. 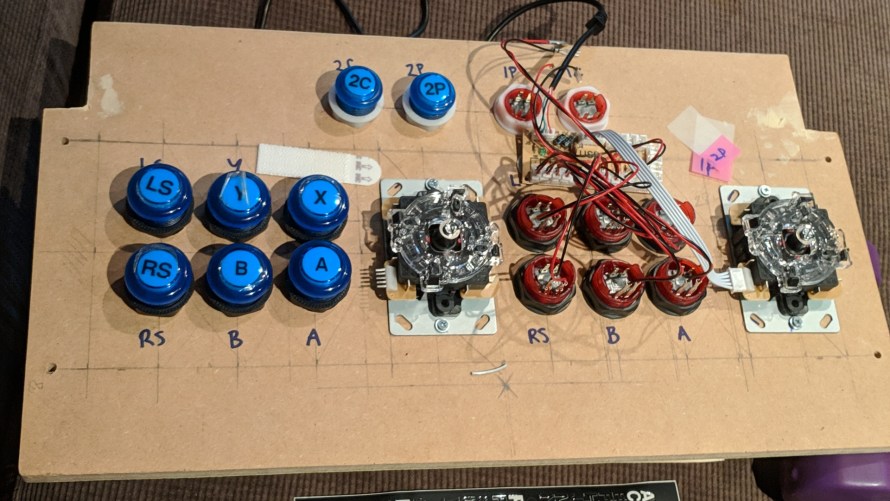
Working through labels for all the buttons.
Another thing I’m waiting on are speakers which are intended to occupy both upper corners of the panel. Removing the original control panel means the speaker goes with it so I’ll need a decent replacement. Fitting those cleanly will depend a lot on what I can find so the final assembly and finish will take some trial and error to get right. I’m also tossing up if I should cut out a new panel and improve the button alignment but it might not be a big deal how it is right now. I’ll see how much it annoys me I suppose. 😉
Even if the end product doesn’t turn out all that successful I’m having a blast trying to figure out how this works. Also gives me an excuse to add a couple more tools to the collection. I won’t be giving up my day job but for the time being it’ll keep me occupied outside of it. 🙂
Categories: Gaming, Modifying an Arcade1Up, Opinion, Technology, Tips & Tricks


Wow – great effort mate. Starting to take shape.
LikeLiked by 1 person