By now you’re probably pretty experienced in finding your way around the galaxy of Elite Dangerous and making a few credits from it too. But if you’re like me, there’s still plenty more to learn as you work your way up the ranks.
The following is what I’ve picked up so far as I’ve been travelling further out; it’s worth noting that it is oriented more towards exploration as that’s my preference when playing but hopefully there might be something useful here for everyone.
If you’re new here and looking to make a start, check out our first guide on Elite Dangerous.
Sticking to your route
Being able to plot routes from the galaxy map makes the long distance trips far easier to manage than if you had to plot each point per jump. This is great for uninterrupted trips but the moment things change and you have to set an in system point you lose your next destination. However there’s a quick way to get yourself back on track again.
Instead of having to plot the points again from the galaxy map (which is not the fastest to load), you can find the next point from your navigation menu. Not only is it tracking local destinations but will have remembered your next hyperspace destination listed as well as the jumps remaining for the route you’ve plotted.
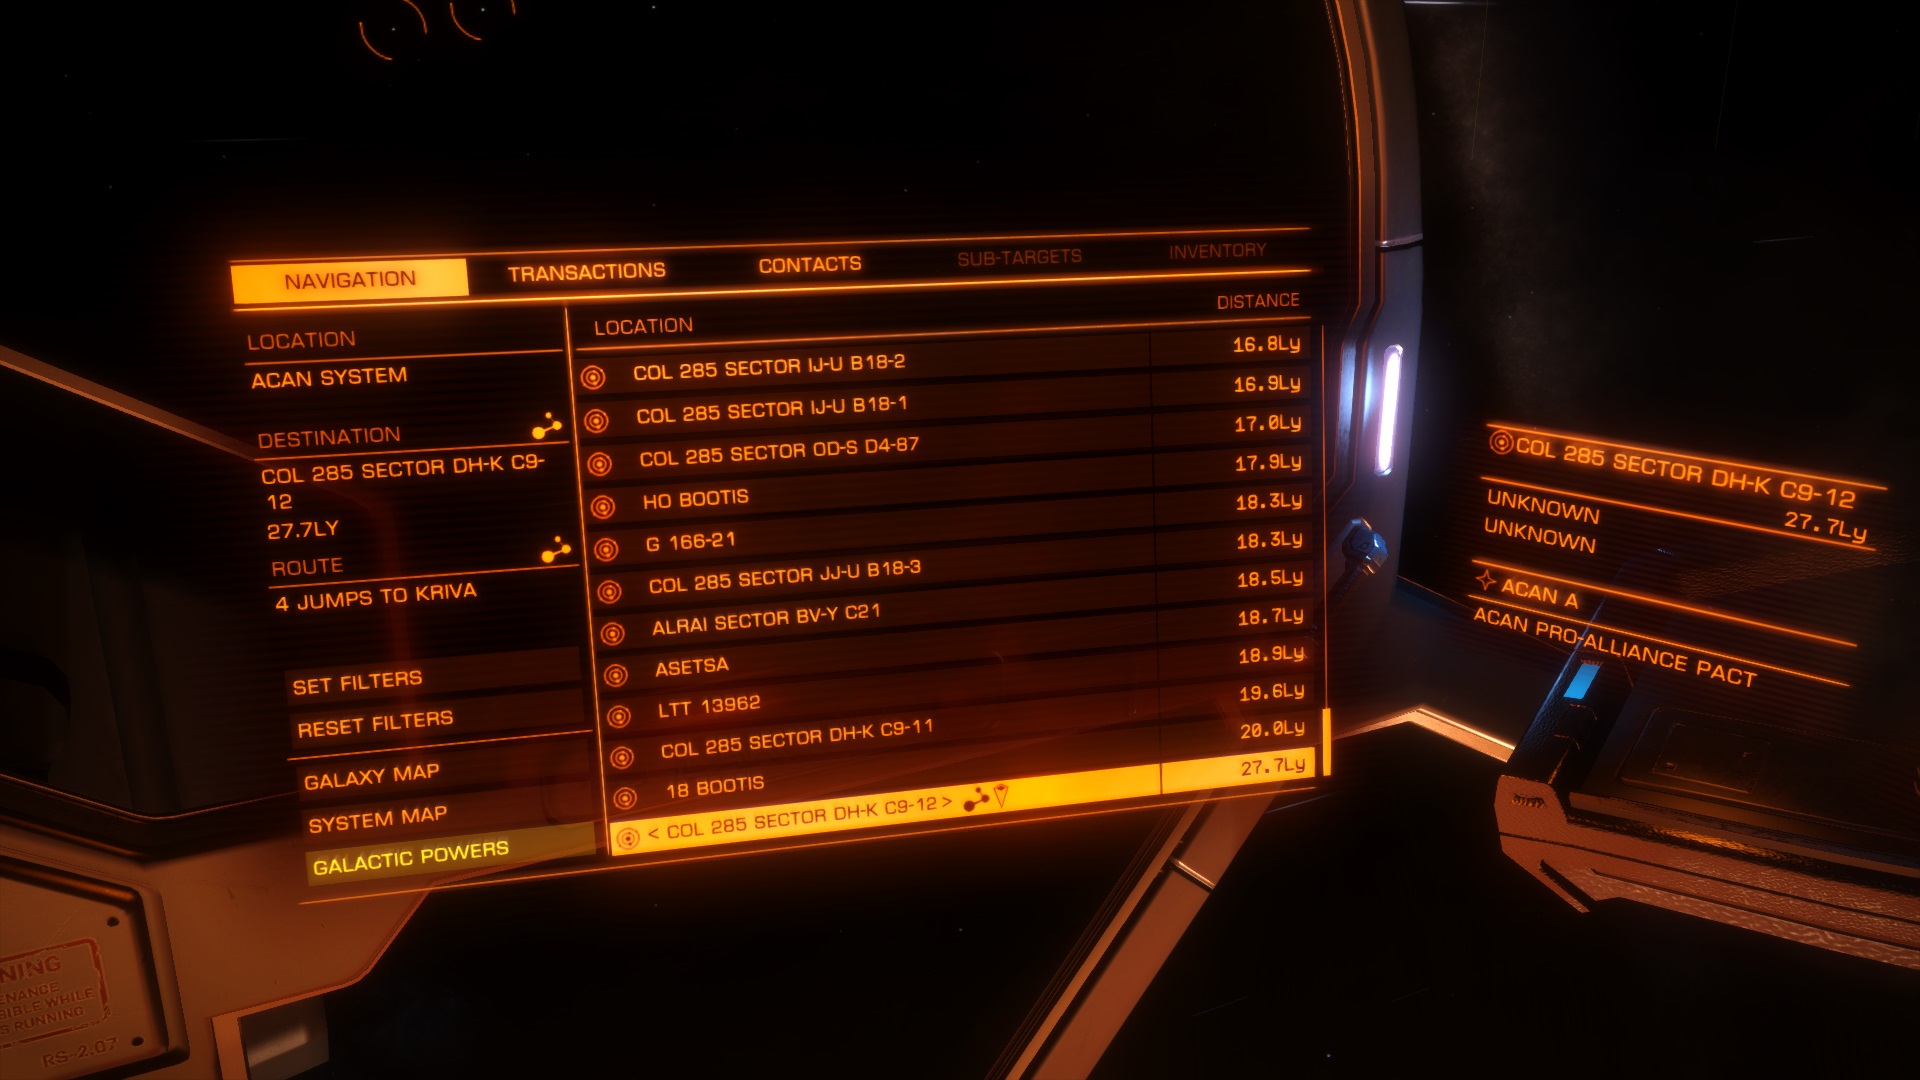
The navigation menu is your friend… and shows you the way to your next destination (see last item).
The more familiar you become with the nav menu, the less you will rely on the galaxy and system maps for navigation and the faster your travels throughout the galaxy will feel. It’ll make a huge difference.
Planet landings
When making an approach to a planet for docking at a station on its surface, keep a close eye on the target reticle. If the circle is a solid line, you have a clear approach but if it is a dashed line your approach is obscured by the planet itself; if that is the case, don’t allow the ship to get too close to the planet as it can be a long journey to your destination if you exit supercruise too early. As you approach the planet, just aim for the horizon and gently feather your maneuvering thrusters to arc around the planet until your destination is visible.
Once you get close enough to the surface for the game to transition to planet based flight try to gradually reduce your altitude so that you are flying at the maximum velocity possible – this may mean if you are approaching a destination you will resort to a steep dive in the last 20km which will slow you down very quickly in time to land. If you dive too early you find you have slowed down too much and are left with a long trip to your destination.
SRV
Once you’re planet side at a station it can be tempting to take your Surface Recon Vehicle (SRV) out for a spin… after all it’s all nice and safe here isn’t it? And it’s true – any chance to test out your driving skills is a good idea. And there’s usually plenty of materials on the surface for you to collect so you can synthesize materials for your ship.
Driving around on the surface can be crazy fun with changes in gravity impacting on the handling substantially. In all likelihood you are going to flip the SRV over and be left wondering if you are now stranded. Before you reach for the self destruct and spawn back in your ship, it is worth spending some time working the thrusters and steering as there is a good chance you will be able to get the vehicle righted and save the expense of replacing it.
However when the time has come to go back you’ll find that parking at your ship’s docking bay won’t help you at all. The trick is that you have to contact the base again and request docking – this will then allow you to return to your ship via the garage under tour ship’s docking bay. It’s an easy thing to miss but frustrating as hell when you’re stuck.
Do it yourself refueling
The fuel scoop is an essential item in your ship’s inventory when you begin to venture out further from your starting point because no matter how many fuel tanks you cram into your ship you’ll never have enough to get you to where you want to be.
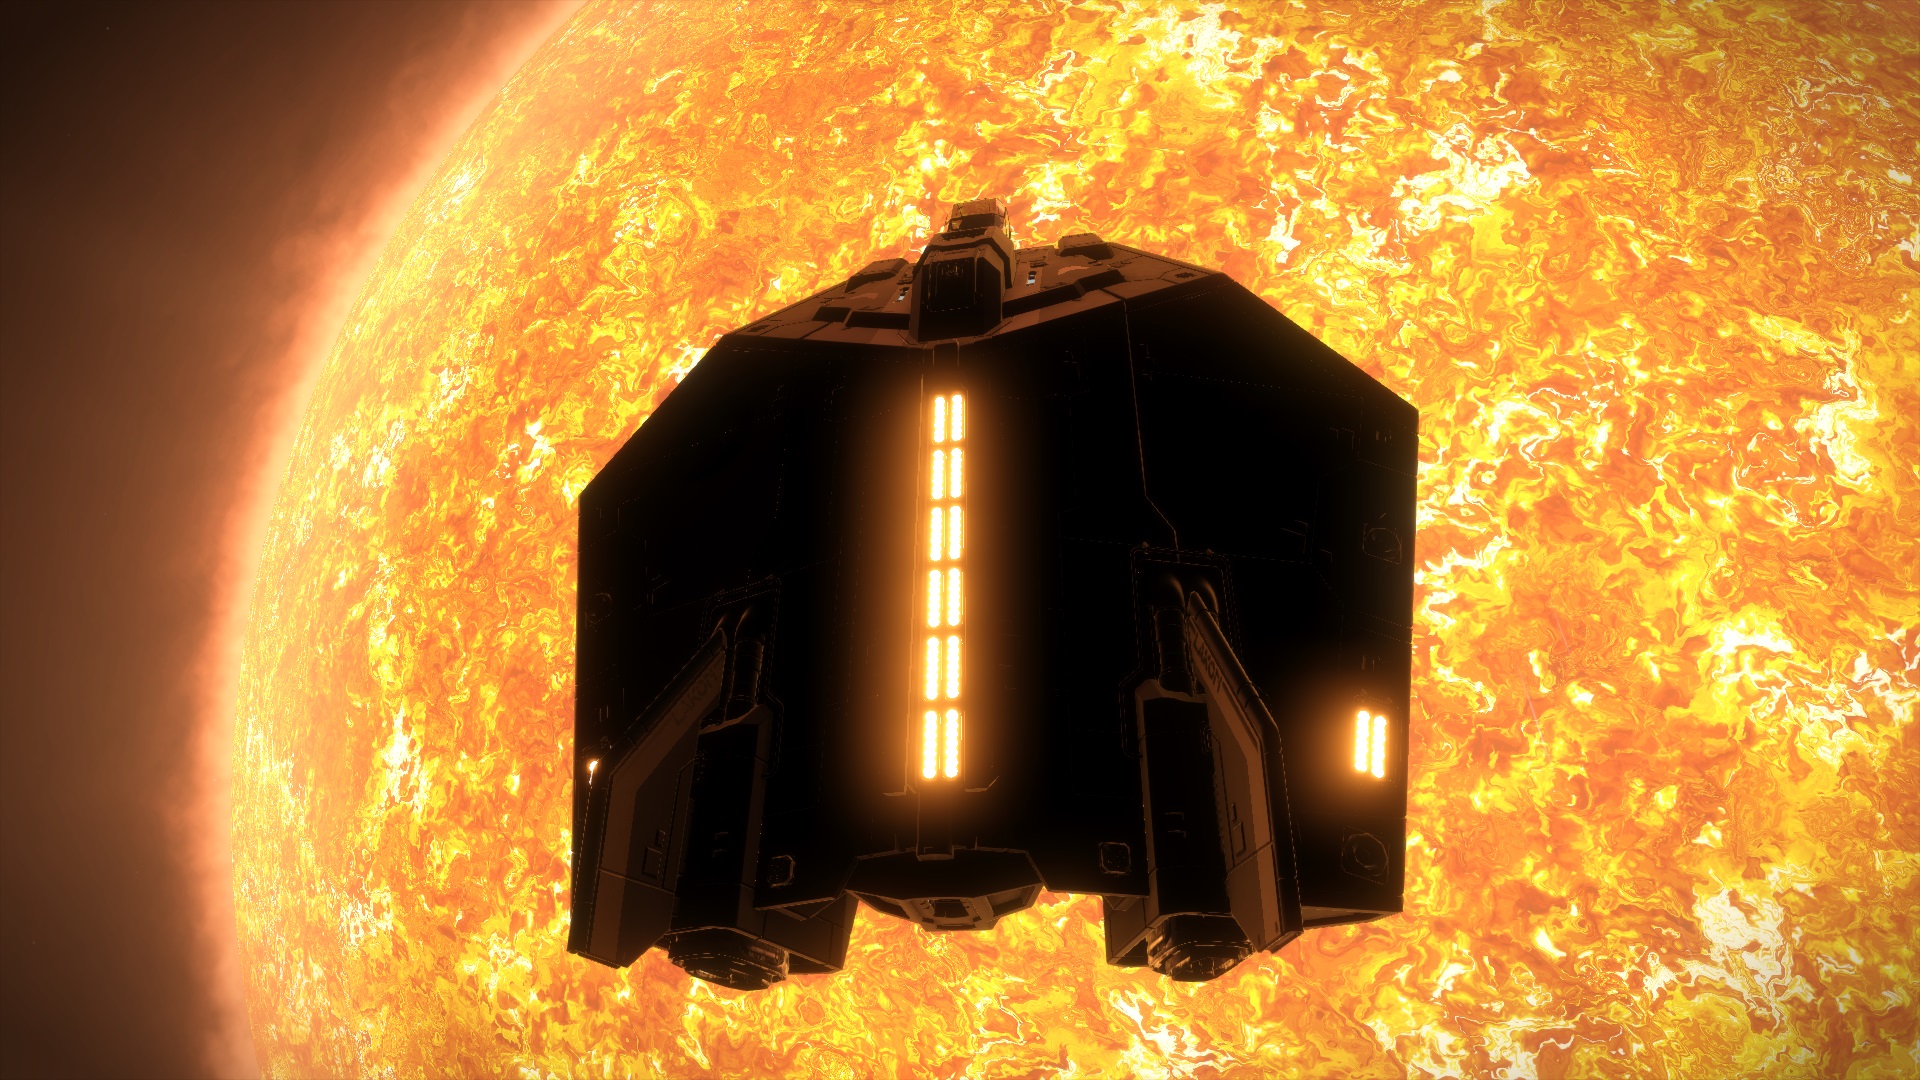
Refueling works… if you take your time.
The process is simple enough – skirt close enough to a start and the fuel scoop kicks in and slowly refuels your ship. That still doesn’t mean there isn’t a whole lot of ways to screw up:
- Get too close to the start and you’ll exit supercruise, likely damaging your ship
- Let the ship’s heat levels get too high and you’ll damage your ship
- Attempt a hyperspace jump while the fuel scoop is active and your heat levels will spike, damaging your ship
As you might gather, mistakes will not help you or your ship and for long distance flights you don’t really want to be damaging it on every fuel stop.
I found I could reduce my chances of screwing up by not attempting to push the fuel scoop to its maximum. Fly close enough to the star to begin the process and as the temperature and refueling rates rise, usually I aim for the temperature hitting the 70% levels, begin to pull up. Keep doing so until you reach a point where the temperature level remains stable during the refuelling then come to a halt (still in supercruise, that’s about 30Km/s) and level out the ship.
At that point you have effectivity “parked” your ship above a star. As long as you’re at a safe distance from the star the temperature won’t rise to damage your ship and you don’t need to risk manoeuvring at speed to collect more fuel. At least for me it has been the most effective way to use the fuel scoop.
If you’re parked and refuelling in an uncharted system, try scanning the star – if it hasn’t already been done by someone else you’ll get additional data that you can cash in at Universal Cartographics. Every credit counts in the beginning!
You won’t be refueling as fast as you could by travelling at speed but you should be able to do it safely. Depending on the activity in the system and if anyone is chasing you you can take a moment to plan the next part of your trip, reconfigure firing groups or grab a drink. Once you’re done just point the ship’s nose away from the star and speed up again. When you are far enough from the star the fuel scoop will retract and then it is safe for your ship to make a frameshift jump into onto your next destination.
Not every star you visit will allow you to refuel so it’s wise to be conservative when you decide on your next fuel stop. Only certain star types will allow refuelling: A, B, F, G, K, M, O, or “KGB FOAM” as suggested in the Frontier Forums. The game will now highlight on galaxy map the last star you can refuel at but you might still find it useful to check the galaxy map and if there is a star close by that will do the job better (with a station) and replot your destination to there.
If it looks like you might have trouble reaching your fuel stop, try switching the route plotter options to follow the most economical path. It will take longer to get there but could save you a lot of grief and avoid you being stranded and thinking of abandoning ship. And there is nothing to stop you from trying to replot back to the fastest path and see if you might be able to get to that refuelling star a little faster.
The rewards of boldly going…
If you’re keen to just head on out there and see what’s hiding in the galaxy you will definitely need to equip yourself with everything necessary for the long haul. Add the things we’ve discussed here will go a long way to improving your chances of success. Having a fuel scoop is essential to that as you’re likely to be a long way from the nearest station for a fill up. Other components are optional but will improve your success rate and inevitable rewards.
An Advanced Discovery Scanner is VERY expensive but ensures you can scan a whole system in one shot as it is not limited by range. It’s also very useful in missions where you are recovering salvage as it saves you from having to travel from planet to planet. Adding a Detailed Surface Scanner too will allow you to get further information on individual stellar bodies but is extremely range limited. If you want to maximize the rewards you get for scanning a system and cashing the data in when you return, having both installed will help.
To help with the upkeep of your ship, an Auto Field-Maintenance Unit will help keep the lights on and your ship working at its best. However it is limited by the amount of ammo it has available so you will need to be prepared to mine on planets and moons so that you can synthesize more. In addition it can’t repair a breached canopy, a power-plant or itself so you will want to stay out of trouble if you can. Worth noting though… if you have a second one installed they can fix each other.
ObsidianAnt has a great video (see below) highlighting a few locations during his own journeys – there’s plenty to find out there so if you’re willing to go for it you might just end up having your own unique stories to tell too.
And lastly…
… don’t be afraid to look for help! Games such as this are intimidating to take on alone and you’re more than likely to miss one of two things that might just make your chosen path a lot easier. In this case, the Elite Dangerous Wiki is a good place to start for understanding the specifics of items and how you they might be of use to you. It might not answer everything though and that’s where the Frontier Forums come in where you can search for answers or offer your own. Details regarding updates to the game appear here too so it’s a useful site to visit occasionally.
As we reach the end of another guide I can’t wait to see what’s coming down the line for Elite Dangerous. I would never have expected to have this much to say about any single game but Elite has worked its magic on me. With Gamescom announcements real soon and the prospect of ship crews and launching fighters, the game is going to feel a lot less lonely and even more immersive.
If there’s anything we’ve missed (likely!), feel free to let us know in the comments below.
Categories: Elite Dangerous Microguides, Gaming, Tips & Tricks


nice and interesting. Just one thing more about fuel scooping. The key for avoiding troubles is speed: the lower it is, the more control you have in keeping the right distance from the star. If you are fuel-scooping at high speed, it will take a moment of distraction to get too close and burn your butt. On the contrary, at the lowest supercruise speed (30 km/s) you are pratically still and fuel scooping rate / ship temperature will be constant, allowing you to refill your fuel tank while you go taking a beer from the fridge in complete safety.
LikeLiked by 1 person
Parking above a star is a tactic I use myself to refuel when I need to take a break. 🙂
I thought I might have left it out by mistake but then realised it was just not clearly explained so I’ve updated it to hopefully be a little clearer. Thanks for the feedback!
LikeLiked by 1 person